How to Upload My Files on My Host Name
Mar 30, 2022
Domantas Thou.
5min Read
How to Upload Your Website (in 6 Easy Steps)
Creating your own website will help boost your online presence, aggrandize your customer base, and increment your conversion rate. However, it'll exist most impossible to attain these goals if you haven't uploaded your website in the starting time place.
Download eBook: Build Your Commencement Website in 9 Easy Steps
Best of all, you don't need coding feel to launch your site on the web server. A lot of hosting services and FTP programs provide convenient tools for uploading a website within clicks.
For more than information, read our article and find out the full instructions on how to get your website live on the internet inside 6 quick, simple steps.
i. Pick a Reliable Web Hosting Visitor
Creating and maintaining a website is not something that you should take lightly. Information technology's crucial to pick a top-notch web host that has all the key features to kickstart your project.
Hither are several factors that you should consider when choosing a hosting provider :
- Live back up . A good hosting service should take a team of experts who can aid y'all at any time. There'south no worse feeling than running into some issues and having to await for days to get a response.
- Control over your web hosting space . The less control you accept over your hosting account, the more probable yous are to see trouble when your site grows.
- Room for growth . Before you choose web host, make certain information technology offers scalable solutions that tin can provide more power (such equally virtual private servers or cloud website hosting).
- Money-back guarantee . Nobody likes a bad investment, so make sure to check for arefund policy . This will give yous a time frame to test everything out earlier committing to the hosting service.
2. Choose Your Website Upload Method
The next challenge is picking the right tool for uploading your website to the internet. Here are four of the well-nigh popular tools to upload a website:
File Manager
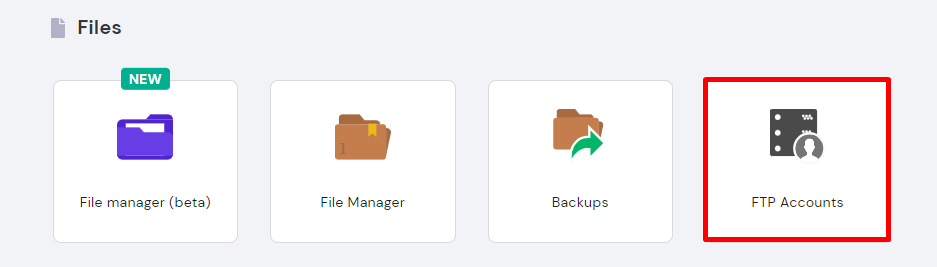
A file manager is a browser-based tool with all the key features to take care of your website files and directories. If you have a Hostinger account, log into the hPanel and find File Managing director nether the Files section.
Withal, the File Manager has an upload limit. If your website files are larger than 256MB , y'all should opt for the next tool instead.
File Transfer Protocol (FTP)
About spider web hosting providers support FTP or file transfer protocol, which you can use to connect to an FTP client. If you lot don't take an FTP client, make certain to install one on your PC.
For Hostinger users, all the required credentials for accessing your FTP client are located in FTP Accounts under the Files department.
There, you tin find all the important information regarding your FTP account, such as your FTP username, hostname, and countersign.

There's no size limit when it comes to uploading files with an FTP plan. Even so, it does have a bit of technical noesis that y'all tin learn from this commodity on how to configure FileZilla and any other FTP clients.
Automatic Website Importer
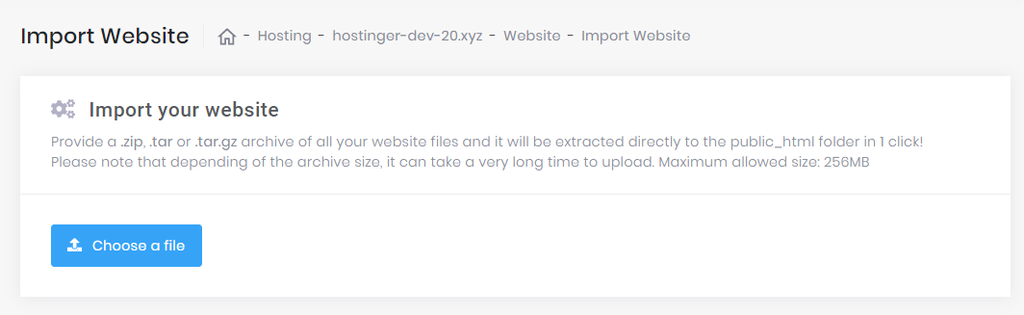
For Hostinger users, you tin can find an Import Website feature in hPanel. You can use this feature to extract a website archive to the public_html directory. The tool supports . nix , .tar and .tar.gz formats, and the upload limit is 256MB.
WordPress Migration Plugins
If you plan to use WordPress, at that place are several means to upload your website to the CMS. 1 of the easiest methods is using aWordPress migration plugin like All in 1 WP Migration. Later on installing and activating the plugin , the rest of the steps are self-explanatory.
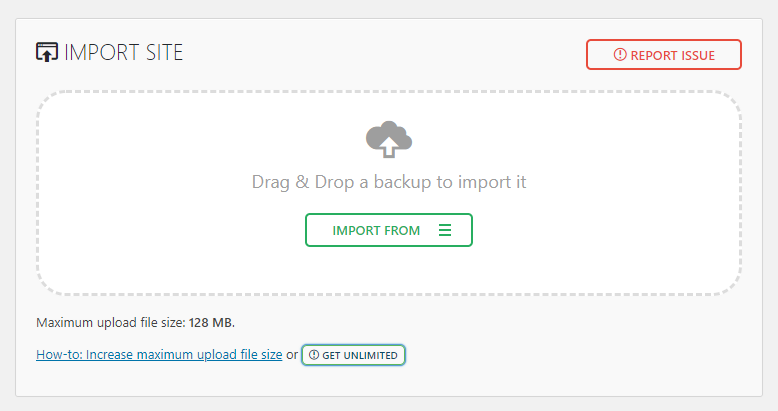
The upload size limit will depend on your hosting provider. Check out how to increase file upload size.
3. Upload Your Website File
Now that you know the all-time tools to upload a website, information technology'due south fourth dimension to get your website live!
In this tutorial, we'll show you how to upload your website using Hostinger's File Manager and a well-known FTP customer, FileZilla .
Using File Manager
- Login to Hostinger's hPanel and navigate to File Manager .
- Once you're in the public_html directory, select the Upload Files icon from the upper-right bill of fare.
- Select the website archive file on your figurer and Upload it to our server.
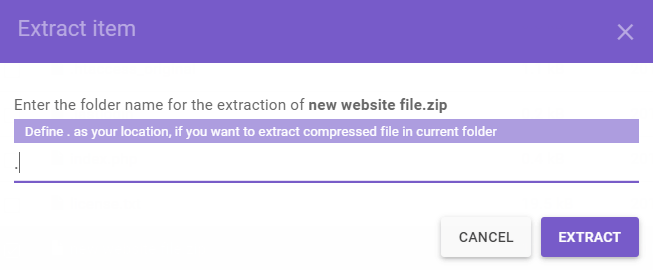
- Right-click on the uploaded file and Excerpt the archived files to the public_html folder.
Using FileZilla
Before nosotros begin, make sure to excerpt the archive to your local estimator as FileZilla doesn't have an Extract feature.
- Connect your account to FileZilla. Use port 22, or connect to SFTP, for a secure connection.
- Navigate to Remote Site panel and click on the public_html folder.
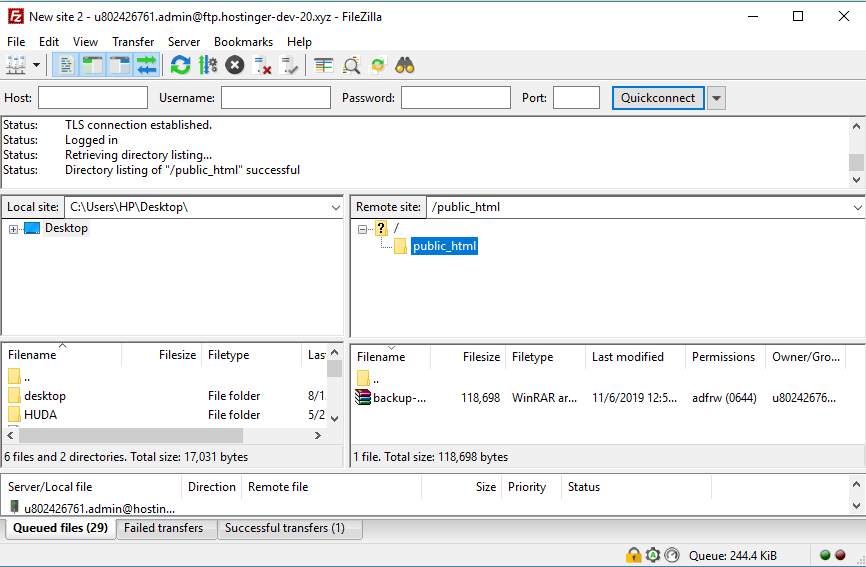
- Head to the Local Site console and locate the extracted files.
- Select the files, right-click to upload them to the public_html directory.

That'due south it! By following the above steps, you can transfer all files to public_html without doing any extra work. Otherwise, you'll need to connect via SSH and excerpt the archive manually .
4. Movement the Website Files to the Main Root Directory
In some cases, an additional directory will be created when yous upload website files. As a upshot, visitors will exist directed to yourdomain.com/subfolder instead of the default yourdomain.com.
To prevent that from happening, you demand to make sure all the files are located in the root directory of your domain, which is public_html .
You can utilise the File Managing director to motility your website files. All you need to do is right-click on the subfolder, select the Move choice, and gear up public_html as the destination.
5. Import Your Database
If your website uses a database, you'll also need to import information technology along with your website files:
- Create anew MySQL database and user .
- Admission your newly created database via phpMyAdmin.
- Utilise the Import section to upload the backup file of your database.
- Update the MySQL database connection details ( database proper noun , host , user , countersign ) in its configuration files.
Skip this part if yous don't apply any database.
six. Check If the Website Works
In one case you lot complete your upload, information technology'due south time for a final check!
If your domain name is already pointed to your spider web host , enter the domain name into your browser and see if information technology directs y'all to your website.
Keep in listen that DNS changes can accept upwardly to 48 hours to fully propagate worldwide. As such, if you just pointed your domain to the web host'southward proper name servers, you might need to wait for a while.
Use an online tool like whatsmydns.net to cheque the state of your DNS propagation. Merely enter your domain proper noun and the tool will bank check the DNS records confronting multiple name servers.
Should yous follow all the instructions correctly, your website will appear just fine. However, if you run into an effect, enquire your hosting provider for assist.
And if you're a Hostinger client, contact us via the live chat and one of our customer success agents volition exist ready to help you!
Conclusion
Congratulations, now your website is live on the internet!
To recap, hither are the steps to upload your website to the spider web server:
- Pick the right hosting provider.
- Choose the tool and method to upload your website.
- Upload your website files.
- Move the website files to the main root folder.
- Import your database.
- Check if your website works worldwide.
That's it! Information technology may sound a bit complicated at first, but if you follow all the steps carefully, you lot'll go your website online in no time. We promise this article volition assistance you out and practiced luck!

Domantas leads the content and SEO teams forwards with fresh ideas and out of the box approaches. Armed with extensive SEO and marketing knowledge, he aims to spread the discussion of Hostinger to every corner of the world. During his free time, Domantas likes to hone his web development skills and travel to exotic places.
Source: https://www.hostinger.com/tutorials/website/how-to-upload-your-website
0 Response to "How to Upload My Files on My Host Name"
Post a Comment